Common Epoxy Flooring Problems and Solutions
Epoxy flooring is widely used in garages, warehouses, factories, workshops and commercial spaces because it creates a durable, seamless and easy-to-clean surface.
However, achieving a professional finish requires proper substrate preparation, accurate mixing, suitable environmental conditions and the correct application tools. When one of these factors is overlooked, problems such as bubbles, peeling, uneven colour or a sticky surface may appear.
This guide explains the most common epoxy flooring problems, their likely causes and practical ways to prevent or correct them.
1. Bubbles in the Epoxy Surface
Bubbles are among the most common epoxy flooring problems. They may appear during application or after the coating begins to cure.
Common causes
- Air trapped during high-speed mixing
- A porous concrete substrate releasing air
- Missing or unsuitable primer
- Applying epoxy while the substrate temperature is rising
- Excessive roller movement
- Moisture in the concrete
- Applying a layer that is too thick
Concrete contains small pores. As the temperature rises, air inside these pores expands and escapes through the wet coating, creating bubbles.
Solutions
While the epoxy is still workable, carefully use a suitable spiked roller to release trapped air. Avoid continuing after the material starts to cure, as the roller may leave permanent marks.
For severe bubbles in cured epoxy:
- Allow the coating to cure completely.
- Sand or grind the affected area.
- Remove all dust and contamination.
- Repair deep holes if necessary.
- Apply a compatible primer.
- Recoat according to the manufacturer’s instructions.
Prevention
- Test the substrate moisture level.
- Apply the recommended primer.
- Mix at the specified speed.
- Keep the mixing paddle below the liquid surface.
- Apply the coating during stable or falling temperatures.
- Use a spiked roller within the working time.
2. Pinholes
Pinholes are small openings that remain visible after the coating has cured. They are usually caused by air escaping from the substrate.
Common causes
- Highly porous concrete
- Insufficient primer
- Air trapped beneath the coating
- Applying epoxy over unfilled pores
- Incorrect rolling technique
- Temperature changes during application
Solutions
Small pinholes can sometimes be repaired with a compatible epoxy filler or an additional thin coat. Large or widespread defects normally require sanding, cleaning and recoating.
Prevention
Seal porous concrete with a suitable primer before applying the main coating. In some cases, a second primer coat may be necessary.
Apply primer evenly and avoid leaving dry areas.
3. Peeling or Delamination
Peeling occurs when the epoxy loses adhesion and separates from the substrate.
Common causes
- Poor surface preparation
- Dust left after grinding
- Oil, grease or chemical contamination
- Excessive concrete moisture
- A weak concrete surface
- Applying epoxy to a smooth or sealed substrate
- Using incompatible products
- Applying outside the recommended recoating window
Solutions
Loose coating cannot be repaired by simply applying another layer on top.
The affected material should be removed by grinding or another suitable mechanical method. The substrate must then be inspected, cleaned, repaired and properly prepared before recoating.
If moisture caused the failure, identify and correct the moisture source before applying a new system.
Prevention
- Mechanically grind or shot-blast the floor.
- Remove all dust with an industrial vacuum.
- Test for moisture.
- Clean oil and grease contamination completely.
- Use a compatible primer.
- Follow the specified recoating time.
Proper surface preparation is one of the most important factors in epoxy floor adhesion.
4. Fisheyes and Craters
Fisheyes are small circular areas where the epoxy pulls away from the surface. They often resemble tiny craters.
Common causes
- Oil or grease
- Silicone contamination
- Wax
- Cleaning-product residue
- Moisture
- Contaminated tools or footwear
- Airborne contamination
Solutions
Allow the coating to cure and sand or grind the affected areas. Clean the surface with a suitable product and apply a compatible repair coat.
Applying additional epoxy directly over contamination usually does not solve the problem.
Prevention
- Degrease the substrate thoroughly.
- Keep application tools clean.
- Avoid silicone products near the work area.
- Wear clean flooring shoes.
- Protect the surface from dust and airborne contamination.
5. Sticky or Soft Epoxy
A properly cured epoxy floor should not remain sticky or soft beyond its specified curing time.
Common causes
- Incorrect resin-to-hardener ratio
- Incomplete mixing
- Unmixed material on the bucket walls or bottom
- Low temperatures
- Using incompatible components
- Adding unapproved solvents
- Expired or contaminated material
Solutions
If the coating remains soft because of incorrect mixing, additional curing time may not solve the problem.
The defective material usually needs to be removed. Clean and prepare the surface before applying a correctly measured and thoroughly mixed replacement coat.
Prevention
- Follow the exact mixing ratio.
- Measure components accurately.
- Mix for the recommended time.
- Scrape the bucket sides and bottom while mixing.
- Transfer the mixture into a second clean bucket and mix again when recommended.
- Maintain the required application and curing temperature.
Never add extra hardener in an attempt to make the epoxy cure faster.
6. Uneven Colour or Gloss
Colour and gloss differences can make an epoxy floor look patchy.
Common causes
- Inconsistent mixing
- Different material batches
- Uneven coating thickness
- Applying sections at different times
- Incorrect roller technique
- Temperature differences across the floor
- Uneven substrate absorption
- UV exposure
Solutions
Minor gloss differences may become less visible after applying a compatible uniform topcoat.
Significant colour variation may require sanding and recoating the complete area rather than repairing small sections.
Prevention
- Use material from the same production batch where possible.
- Mix each batch consistently.
- Maintain a wet edge.
- Apply a uniform thickness.
- Use the same roller type throughout the project.
- Plan batch quantities before starting.
- Apply a UV-resistant topcoat where sunlight exposure is expected.
Standard epoxy may yellow or change colour when exposed to ultraviolet light.
7. Roller Marks and Application Lines
Visible roller marks, overlap lines or tool marks can remain after the floor cures.
Common causes
- Working after the epoxy begins to set
- Applying an uneven coating thickness
- Using an unsuitable roller
- Excessive roller pressure
- Failing to maintain a wet edge
- Slow application
- Incorrect material viscosity
Solutions
Once cured, visible marks usually need to be sanded before applying another uniform coat.
Prevention
- Prepare all tools before mixing.
- Divide the floor into manageable sections.
- Maintain a wet edge.
- Use consistent roller pressure.
- Back-roll in the same direction.
- Stop rolling once the working time is nearly over.
- Ensure enough workers are available for large projects.
8. Footprints and Shoe Marks
Ordinary work boots can leave deep footprints in wet epoxy.
Common causes
- Walking directly on wet epoxy
- Wearing unsuitable footwear
- Using spikes that are too short
- Sliding spiked shoes instead of lifting them
- Entering the floor after curing has started
- Standing in one place for too long
Solutions
Marks in fresh, flowable epoxy may close naturally if they are small. Larger marks may need to be carefully corrected while the coating remains workable.
Cured footprints usually require sanding or grinding followed by recoating.
Prevention
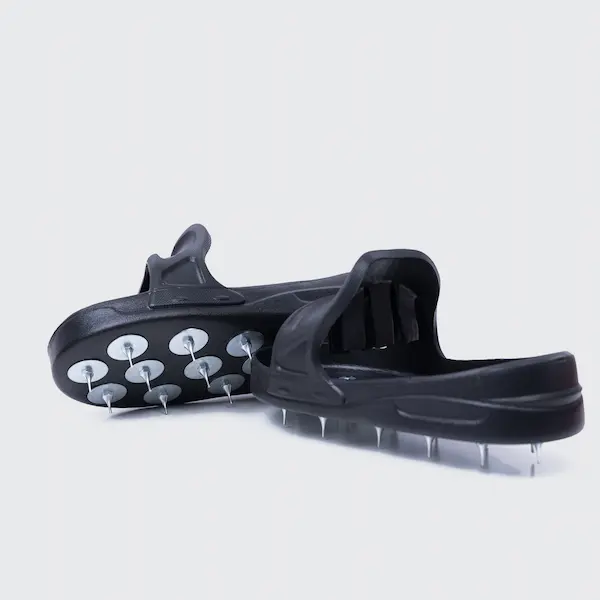
Wear professional flooring spiked shoes over suitable work boots. Select the spike length according to the coating thickness.
Walk slowly, use short steps and lift each foot vertically. Do not drag or twist the spikes across the surface.
9. Uneven Coating Thickness
An inconsistent coating layer can affect both appearance and performance.
Common causes
- Poor material distribution
- Incorrect squeegee or notched tool
- Uneven roller pressure
- Incorrect material quantity
- Working without marked sections
- Substrate height variations
- Material collecting in low areas
Solutions
Small variations may be corrected with an additional coat after the surface has been prepared. Severe high or low areas may require grinding, filling or levelling before recoating.
Prevention
- Calculate the required material quantity.
- Divide the floor into measured sections.
- Use a suitable gauge rake or calibrated squeegee.
- Monitor wet-film thickness.
- Maintain consistent application speed.
- Inspect the substrate before coating.
10. Cracks in the Epoxy Floor
Epoxy coatings can crack when the substrate underneath moves or cracks.
Common causes
- Existing concrete cracks were not repaired
- Movement joints were coated over
- Concrete shrinkage
- Structural movement
- Thermal expansion
- Impact damage
- Applying a rigid coating over an unstable substrate
Solutions
Identify whether the crack is static or moving.
Static cracks may be opened, cleaned and filled with a compatible repair material before recoating.
Moving cracks and structural joints require a flexible treatment designed to accommodate movement. Simply covering them with rigid epoxy may cause the crack to return.
Prevention
- Inspect the concrete before installation.
- Repair cracks correctly.
- Do not fill active movement joints with rigid epoxy.
- Use flexible joint materials where required.
- Confirm that the substrate is structurally sound.
11. Blistering
Blisters are raised areas that form when pressure develops beneath the coating.
Common causes
- Moisture vapour transmission
- Trapped air
- Osmotic pressure
- Applying over contaminated concrete
- Coating a damp substrate
- Temperature changes
Solutions
Remove the blistered coating and inspect the substrate. Moisture testing may be required before selecting a repair system.
If moisture pressure is the cause, recoating without addressing it will probably result in another failure.
Prevention
- Conduct appropriate moisture testing.
- Use a moisture-mitigation system where required.
- Allow new concrete to cure sufficiently.
- Do not coat visibly damp substrates.
- Follow the primer and coating manufacturer’s recommendations.
12. Debris or Dust in the Finish
Dust, hair, insects and loose particles can become trapped in wet epoxy.
Common causes
- Poor site cleaning
- Dust remaining after grinding
- Dirty tools
- Open doors or windows
- Air movement during application
- Contaminated footwear or clothing
Solutions
After curing, remove isolated defects by sanding and repair them with a compatible coating. Widespread contamination may require sanding and recoating.
Prevention
- Vacuum the floor thoroughly.
- Clean tools before use.
- Limit access to the work area.
- Close doors and windows where appropriate.
- Control ventilation without directing dust onto the floor.
- Wear clean clothing and footwear.
13. Slow or Incomplete Curing
Epoxy may take longer than expected to become hard.
Common causes
- Low floor or air temperature
- Incorrect mixing ratio
- Incomplete mixing
- High humidity
- Incompatible materials
- Applying a layer outside the recommended thickness
- Old or poorly stored products
Solutions
If the components were mixed correctly, improving temperature conditions may allow curing to continue.
If the mixing ratio was incorrect, the material may never cure properly and usually must be removed.
Prevention
- Measure both ambient and substrate temperature.
- Store materials under recommended conditions.
- Use accurate mixing ratios.
- Observe minimum and maximum application temperatures.
- Check the product’s shelf life before use.
A Practical Troubleshooting Process
When an epoxy flooring problem appears, follow a systematic process:
- Identify the visible defect.
- Check where and when it appeared.
- Review the material batch and mixing ratio.
- Confirm the application temperature and humidity.
- Examine the substrate condition.
- Check moisture-test results.
- Review surface-preparation methods.
- Confirm primer and coating compatibility.
- Determine whether the defect is local or widespread.
- Consult the material manufacturer before major repairs.
Do not apply another coat until the original cause has been identified.
Essential Tools for Preventing Epoxy Problems
Useful tools for a professional installation include:
- Concrete grinder
- Industrial vacuum cleaner
- Moisture-testing equipment
- Accurate measuring containers
- Low-speed mixing drill
- Correct mixing paddle
- Calibrated squeegee or gauge rake
- Suitable rollers
- Spiked roller
- Professional spiked shoes
- Wet-film thickness gauge
- Temperature and humidity meter
Having all tools ready before mixing begins helps installers work within the epoxy’s limited application time.
Final Thoughts
Most epoxy flooring problems are related to inadequate substrate preparation, moisture, incorrect mixing, unsuitable application conditions or poor tool selection.
Bubbles and pinholes can often be reduced with proper priming and careful mixing. Peeling requires removal of loose coating and correction of the underlying adhesion problem. Sticky epoxy is commonly linked to inaccurate ratios or incomplete mixing, while footprints and roller marks usually result from incorrect timing or application technique.
The best solution is prevention. Test the substrate, prepare the concrete mechanically, measure all components accurately and use suitable professional flooring tools.
A carefully planned installation produces a stronger, smoother and more consistent epoxy floor while reducing expensive repairs.